[vc_row full_width=”stretch_row” css=”.vc_custom_1522740545778{margin-top: -30px !important;margin-bottom: 0px !important;padding-top: 15px !important;padding-bottom: 15px !important;background-color: #3a3a3a !important;}”][vc_column width=”1/4″][vc_column_text]
Kilimanjaro climbing routes:
[/vc_column_text][/vc_column][vc_column width=”3/4″][vc_row_inner][vc_column_inner][boc_button btn_content=”Marangu ” href=”#” size=”btn_small” color=”btn_brown” btn_style=”btn_gradient”][boc_button btn_content=”Machame ” href=”#” size=”btn_small” color=”btn_bondi” btn_style=”btn_gradient”][boc_button btn_content=”Lemosho ” href=”#” size=”btn_small” color=”btn_brown” btn_style=”btn_gradient”][boc_button btn_content=”Umbwe ” href=”#” size=”btn_small” color=”btn_brown” btn_style=”btn_gradient”][boc_button btn_content=”Rongai ” href=”#” size=”btn_small” color=”btn_brown” btn_style=”btn_gradient”][boc_button btn_content=”Northern Circuit” href=”#” size=”btn_small” color=”btn_brown” btn_style=”btn_gradient”][/vc_column_inner][/vc_row_inner][/vc_column][/vc_row][vc_row full_width=”stretch_row_content_no_spaces” equal_height=”yes”][vc_column width=”1/2″ css=”.vc_custom_1525690018820{padding-bottom: 200px !important;background-image: url(https://allweatheradventures.com/wp-content/uploads/2018/04/7-DAYS-MACHAME-ROUTE-SMALL-PICTURE.jpg?id=25147) !important;background-position: center !important;background-repeat: no-repeat !important;background-size: cover !important;}”][vc_row_inner el_class=”bott” css=”.vc_custom_1522739728671{margin-top: -35px !important;padding-top: 30px !important;padding-bottom: 30px !important;}”][vc_column_inner width=”1/2″ css=”.vc_custom_1522740505857{padding-top: 15px !important;padding-right: 15px !important;padding-bottom: 15px !important;padding-left: 15px !important;background-color: rgba(0,0,0,0.6) !important;*background-color: rgb(0,0,0) !important;}” offset=”vc_col-xs-6″][vc_column_text]
Machame Route 7 Days
[/vc_column_text][/vc_column_inner][vc_column_inner width=”1/2″ css=”.vc_custom_1522740646665{padding-top: 15px !important;padding-right: 15px !important;padding-bottom: 15px !important;padding-left: 15px !important;background-color: rgba(0,0,0,0.6) !important;*background-color: rgb(0,0,0) !important;}” offset=”vc_col-xs-6″][vc_column_text]
From $1,630
[/vc_column_text][/vc_column_inner][/vc_row_inner][/vc_column][vc_column width=”1/2″ css=”.vc_custom_1522740462183{padding-top: 30px !important;padding-right: 30px !important;padding-bottom: 30px !important;padding-left: 30px !important;background-color: #d6d6d6 !important;}”][vc_column_text]
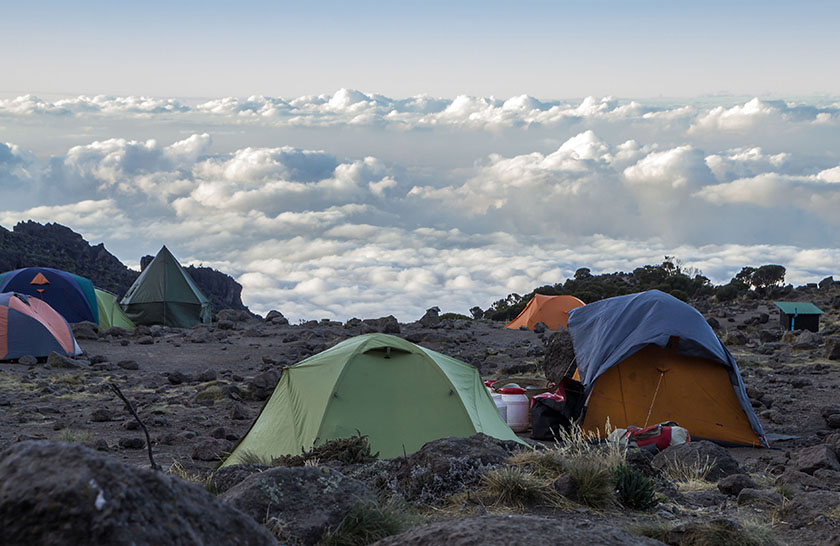
Known as the “Whiskey route”, Truly Machame route is the most popular route and has a very high success rate of making it to the top. It offers beautiful and natural features of landscape. It starts with a nice day of walking through the rainforest and has a nice steady altitude increase each day. The accommodation on the way up and down is strictly camping (movable tents) only. The Machame Route takes you high to Lava Tower on day 3 then brings you down for an overnight at Barranco Camp. This intermediate ascent and descent is the secret to a successful acclimatization and is the reason that this route has a high success rate. The Machame route is normally completed in a minimum of 6 days/5nights on the mountain.
ARRIVE IN TANZANIA
Arrive at the Kilimanjaro International Airport where you will be meet with All weather adventures representative, picked up there and transfer to hotel in Moshi town. Then you will meet your guide who will brief you on your upcoming trek and do an equipment check to make sure you have all the necessary mountain gear. Gear which is missing can be rented on this day.
Hotel: Bed & Breakfast[/vc_column_text][ultimate_modal btn_size=”lg” btn_bg_hover_color=”#c62323″ btn_text=”BOOK THIS TOUR” overlay_bg_opacity=”80″ img_size=”80″][contact-form-7 id=”5″ title=”Fortuna Contact Form 1″][/ultimate_modal][/vc_column][/vc_row][vc_row el_class=”ptab”][vc_column][mpc_connected_icons preset=”mpc_preset_9″ content_preset=”_mpc_preset_1″ layout=”vertical” gap=”25″ lines_number=”1″ lines_color=”#e6bf73″ lines_weight=”10″][mpc_icon_column layout=”style_3″ alignment=”left” padding_css=”padding:0px;” margin_divider=”true” title_font_preset=”mpc_preset_20″ title_font_color=”#ae0202″ title_font_size=”17″ title_font_line_height=”1.4″ title_font_transform=”uppercase” title_font_align=”left” title=”Day 1: Machame Gate (1790meters) to Machame Camp (3010meters)” title_margin_divider=”true” title_margin_css=”margin-bottom:5px;” content_font_preset=”mpc_preset_1″ content_font_color=”#141414″ content_font_size=”14″ content_font_line_height=”1.5″ content_font_align=”left” mpc_icon__icon=”fa fa-font-awesome” mpc_icon__icon_color=”#555555″ mpc_icon__icon_size=”20″ mpc_icon__background_color=”#e0e0e0″ mpc_icon__border_css=”border-radius:50px;” mpc_icon__padding_divider=”true” mpc_icon__padding_css=”padding-top:5px;padding-right:5px;padding-bottom:5px;padding-left:5px;” mpc_icon__margin_divider=”true” mpc_icon__margin_css=”margin-top:-6px;margin-right:15px;” mpc_icon__hover_border_css=”border-radius:20px;” mpc_divider__disable=”false” mpc_divider__width=”10″ mpc_divider__align=”left” mpc_divider__content_padding_divider=”true” mpc_divider__content_padding_css=”padding-top:0px;padding-right:0px;padding-bottom:0px;padding-left:0px;” mpc_divider__lines_color=”#dddddd” mpc_divider__padding_divider=”true” mpc_divider__padding_css=”padding-top:3px;padding-bottom:3px;” hover_padding_css=”padding:0px;”]The first day trekking begins at Machame Gate normally one hour’s drive from Moshi lies the gate to the Machame route. At the Gate you will meet your trekking crew, your guide, porters and cooker. There will be a flurry of activity as porters assemble gear for the trek, where we complete park formalities. The first section of the route climbs steadily and passes through magnificent, dense rainforest. This path is less well-trodden so it can get somewhat overgrown in places and it is often wet and muddy underfoot.
Machame Camp |
||
Distance: |
| 11km / 7 miles |
|
Approx. trekking time: |
| 5 – 7 hours |
|
Zone: |
| Rainforest |
|
Meals: |
| Breakfast |
|
| Lunch |
||
| Dinner |
[/mpc_icon_column][mpc_icon_column layout=”style_3″ alignment=”left” padding_css=”padding:0px;” margin_divider=”true” title_font_preset=”mpc_preset_20″ title_font_color=”#ae0202″ title_font_size=”17″ title_font_line_height=”1.4″ title_font_transform=”uppercase” title_font_align=”left” title=”Day 2: Machame Camp (3010meters) to Shira Camp (3845meters)” title_margin_divider=”true” title_margin_css=”margin-bottom:5px;” content_font_preset=”mpc_preset_1″ content_font_color=”#141414″ content_font_size=”14″ content_font_line_height=”1.5″ content_font_align=”left” mpc_icon__icon=”fa fa-map-marker” mpc_icon__icon_color=”#555555″ mpc_icon__icon_size=”20″ mpc_icon__background_color=”#e0e0e0″ mpc_icon__border_css=”border-radius:50px;” mpc_icon__padding_divider=”true” mpc_icon__padding_css=”padding-top:5px;padding-right:5px;padding-bottom:5px;padding-left:5px;” mpc_icon__margin_divider=”true” mpc_icon__margin_css=”margin-top:-6px;margin-right:15px;” mpc_icon__hover_border_css=”border-radius:20px;” mpc_divider__disable=”false” mpc_divider__width=”10″ mpc_divider__align=”left” mpc_divider__content_padding_divider=”true” mpc_divider__content_padding_css=”padding-top:0px;padding-right:0px;padding-bottom:0px;padding-left:0px;” mpc_divider__lines_color=”#dddddd” mpc_divider__padding_divider=”true” mpc_divider__padding_css=”padding-top:3px;padding-bottom:3px;” hover_padding_css=”padding:0px;”]
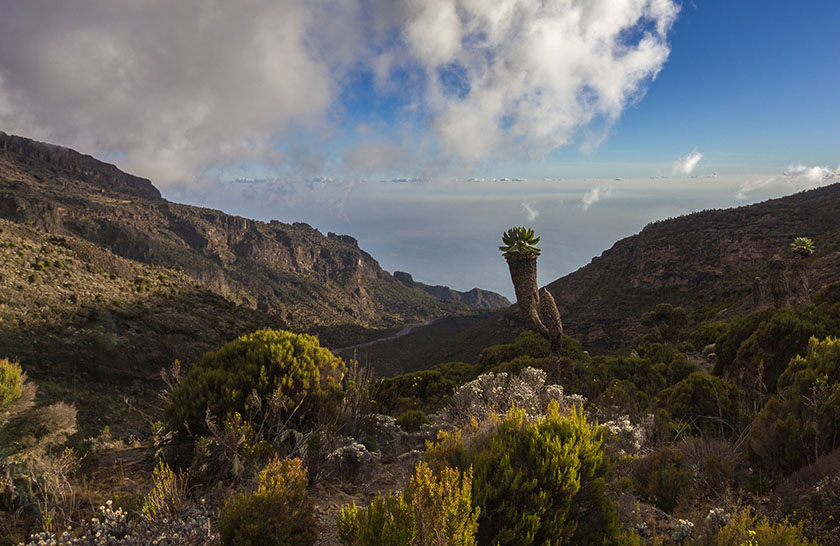
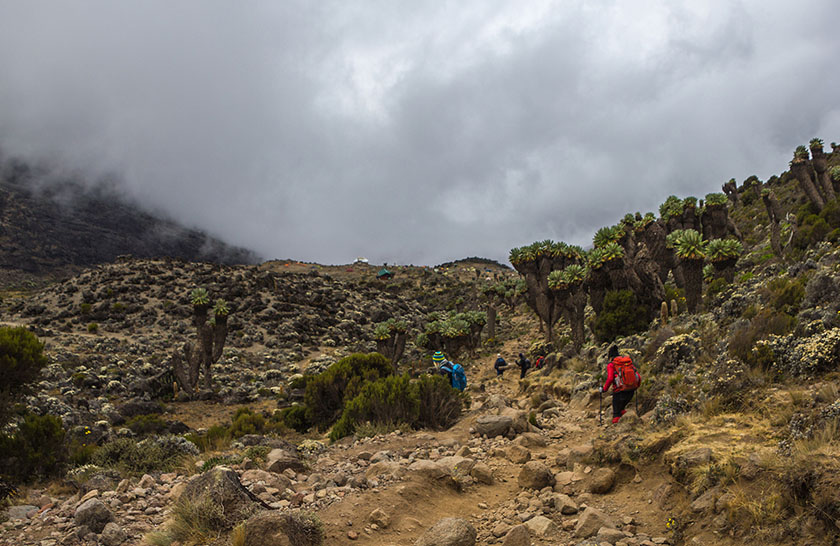
On day two you will rise early, where by our route continues on up through the forest until we reach the steep ascent onto the Shira Plateau, The trek is relatively steep as you enter the low alpine zone which is characterized by moorlands and grasslands. Shira Camp 2 sits on a plateau which provides you with the first views of Kibo in the North-West and Mount Meru in the East. Day two takes approximately 4-6 hours and covers a distance of 5.4km / 3.4miles.
Shira Camp |
||
Distance: |
| 5.4km / 3.4 miles |
|
Approx. trekking time: |
| 5 hours |
|
Zone: |
| Rainforest / Low Alpine Zone |
|
Meals: |
| Breakfast |
|
| Lunch |
||
| Dinner |
[/mpc_icon_column][mpc_icon_column layout=”style_3″ alignment=”left” padding_css=”padding:0px;” margin_divider=”true” title_font_preset=”mpc_preset_20″ title_font_color=”#ae0202″ title_font_size=”17″ title_font_line_height=”1.4″ title_font_transform=”uppercase” title_font_align=”left” title=”
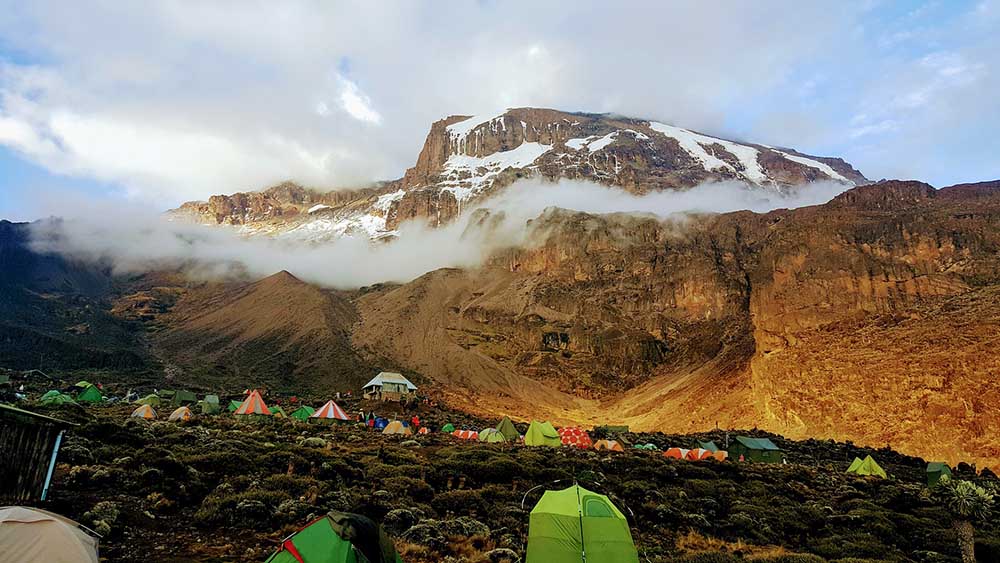
Day 3: Shira Cave (3845meters) to Barranco Camp (3960meters)” title_margin_divider=”true” title_margin_css=”margin-bottom:5px;” content_font_preset=”mpc_preset_1″ content_font_color=”#141414″ content_font_size=”14″ content_font_line_height=”1.5″ content_font_align=”left” mpc_icon__icon=”fa fa-map-marker” mpc_icon__icon_color=”#555555″ mpc_icon__icon_size=”20″ mpc_icon__background_color=”#e0e0e0″ mpc_icon__border_css=”border-radius:50px;” mpc_icon__padding_divider=”true” mpc_icon__padding_css=”padding-top:5px;padding-right:5px;padding-bottom:5px;padding-left:5px;” mpc_icon__margin_divider=”true” mpc_icon__margin_css=”margin-top:-6px;margin-right:15px;” mpc_icon__hover_border_css=”border-radius:20px;” mpc_divider__disable=”false” mpc_divider__width=”10″ mpc_divider__align=”left” mpc_divider__content_padding_divider=”true” mpc_divider__content_padding_css=”padding-top:0px;padding-right:0px;padding-bottom:0px;padding-left:0px;” mpc_divider__lines_color=”#dddddd” mpc_divider__padding_divider=”true” mpc_divider__padding_css=”padding-top:3px;padding-bottom:3px;” hover_padding_css=”padding:0px;”]
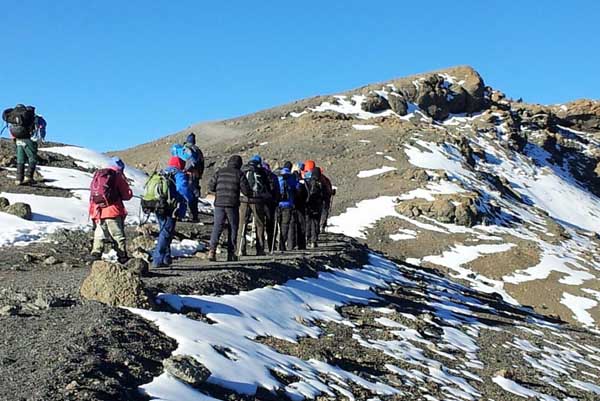
Day three, walking now on high moorland, the landscape changes the entire character of the trek. We traverse the southwest side of Kilimanjaro, passing underneath the Lava Tower and the final section of the Western Breach and finally reach camp. The day has been spent at altitude (up to 4600m), Although you end the day at a very similar elevation to when you started from Shira Camp, it is arguably one of the most important days on your trek as it gives you a chance to climb high and sleep low which is important for proper acclimatization.
Barranco Camp |
||
Distance: |
| 10.8km / 6.7 miles |
|
Approx. trekking time: |
| 8 hours |
|
Zone: |
| Low alpine zone / High alpine zone |
|
Meals: |
| Breakfast |
|
| Lunch |
||
| Dinner |
[/mpc_icon_column][mpc_icon_column layout=”style_3″ alignment=”left” padding_css=”padding:0px;” margin_divider=”true” title_font_preset=”mpc_preset_20″ title_font_color=”#ae0202″ title_font_size=”17″ title_font_line_height=”1.4″ title_font_transform=”uppercase” title_font_align=”left” title=”Day 4: Barranco Camp (3960meters) to Karanga Camp (3963meters)” title_margin_divider=”true” title_margin_css=”margin-bottom:5px;” content_font_preset=”mpc_preset_1″ content_font_color=”#141414″ content_font_size=”14″ content_font_line_height=”1.5″ content_font_align=”left” mpc_icon__icon=”fa fa-map-marker” mpc_icon__icon_color=”#555555″ mpc_icon__icon_size=”20″ mpc_icon__background_color=”#e0e0e0″ mpc_icon__border_css=”border-radius:50px;” mpc_icon__padding_divider=”true” mpc_icon__padding_css=”padding-top:5px;padding-right:5px;padding-bottom:5px;padding-left:5px;” mpc_icon__margin_divider=”true” mpc_icon__margin_css=”margin-top:-6px;margin-right:15px;” mpc_icon__hover_border_css=”border-radius:20px;” mpc_divider__disable=”false” mpc_divider__width=”10″ mpc_divider__align=”left” mpc_divider__content_padding_divider=”true” mpc_divider__content_padding_css=”padding-top:0px;padding-right:0px;padding-bottom:0px;padding-left:0px;” mpc_divider__lines_color=”#dddddd” mpc_divider__padding_divider=”true” mpc_divider__padding_css=”padding-top:3px;padding-bottom:3px;” hover_padding_css=”padding:0px;”]Day four starts by descending into the start of the Great Barranco, a huge ravine. We then exit steeply, up the Great Barranco Wall, which divides us from the southeastern slopes of Kibo. It’s a climb over rock, not technical but long and tiring. Passing underneath the Heim and Kersten glaciers, we head towards the Karanga valley. From here we have a steep climb up from Karanga valley to our night’s camp at Karanga camp, set at 3963m. For those feeling strong we will go for a mid-afternoon acclimatization trek up to around 4200m before descending back to camp for the night.
Karanga Camp |
||
Distance: |
| 5.5km / 3.4 miles |
|
Approx. trekking time: |
| 5 hours |
|
Zone: |
| High alpine zone |
|
Meals: |
| Breakfast |
|
| Lunch |
||
| Dinner |
[/mpc_icon_column][mpc_icon_column layout=”style_3″ alignment=”left” padding_css=”padding:0px;” margin_divider=”true” title_font_preset=”mpc_preset_20″ title_font_color=”#ae0202″ title_font_size=”17″ title_font_line_height=”1.4″ title_font_transform=”uppercase” title_font_align=”left” title=”Day 5: Barranco Camp (3960meters) to Barafu Camp (4640meters)” title_margin_divider=”true” title_margin_css=”margin-bottom:5px;” content_font_preset=”mpc_preset_1″ content_font_color=”#141414″ content_font_size=”14″ content_font_line_height=”1.5″ content_font_align=”left” mpc_icon__icon=”fa fa-map-marker” mpc_icon__icon_color=”#555555″ mpc_icon__icon_size=”20″ mpc_icon__background_color=”#e0e0e0″ mpc_icon__border_css=”border-radius:50px;” mpc_icon__padding_divider=”true” mpc_icon__padding_css=”padding-top:5px;padding-right:5px;padding-bottom:5px;padding-left:5px;” mpc_icon__margin_divider=”true” mpc_icon__margin_css=”margin-top:-6px;margin-right:15px;” mpc_icon__hover_border_css=”border-radius:20px;” mpc_divider__disable=”false” mpc_divider__width=”10″ mpc_divider__align=”left” mpc_divider__content_padding_divider=”true” mpc_divider__content_padding_css=”padding-top:0px;padding-right:0px;padding-bottom:0px;padding-left:0px;” mpc_divider__lines_color=”#dddddd” mpc_divider__padding_divider=”true” mpc_divider__padding_css=”padding-top:3px;padding-bottom:3px;” hover_padding_css=”padding:0px;”]
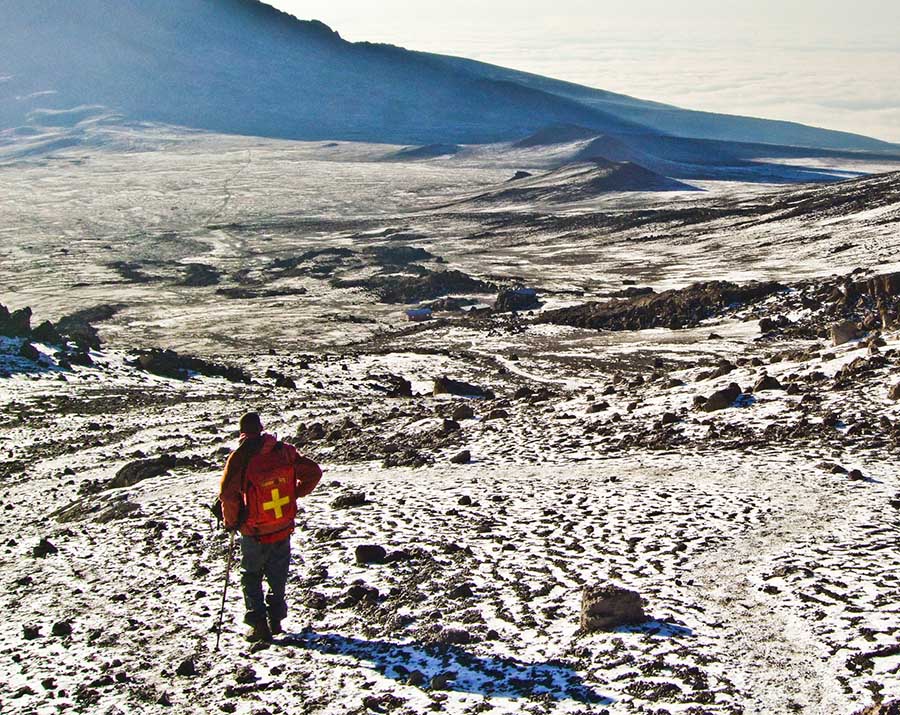
Day five is summit night (and day)! We start off at around midnight, and walk steeply upwards to the summit glaciers. We will be climbing scree for 4 to 5 hours but gain incredible height over a short distance. The views are spectacular. We should be on the crater rim at Stella Point (5739m) as the first rays of the sun hit us. Spectacular ice cliffs within the crater surround us and the views to jagged Mawenzi peak and beyond are breathtaking. Another hour’s walking takes us to the summit, Uhuru Peak (5895m). We begin our descent by returning to Stella Point and then descending on scree slope and track back to Barafu Camp for breakfast, before finally heading down to Mweka Camp for a long well-earned rest.
Barafu Camp |
||
Distance: |
| 3km / 1.9 miles |
|
Approx. trekking time: |
| 3hours |
|
Zone: |
| High alpine zone |
|
Meals: |
| Breakfast |
|
| Lunch |
||
| Dinner |
[/mpc_icon_column][mpc_icon_column layout=”style_3″ alignment=”left” padding_css=”padding:0px;” margin_divider=”true” title_font_preset=”mpc_preset_20″ title_font_color=”#ae0202″ title_font_size=”17″ title_font_line_height=”1.4″ title_font_transform=”uppercase” title_font_align=”left” title=”Day 6: Barafu Camp (4640meters) to UHURU PEAK (5895meters) & down to Mweka Camp (3100meters)” title_margin_divider=”true” title_margin_css=”margin-bottom:5px;” content_font_preset=”mpc_preset_1″ content_font_color=”#141414″ content_font_size=”14″ content_font_line_height=”1.5″ content_font_align=”left” mpc_icon__icon=”fa fa-map-marker” mpc_icon__icon_color=”#555555″ mpc_icon__icon_size=”20″ mpc_icon__background_color=”#e0e0e0″ mpc_icon__border_css=”border-radius:50px;” mpc_icon__padding_divider=”true” mpc_icon__padding_css=”padding-top:5px;padding-right:5px;padding-bottom:5px;padding-left:5px;” mpc_icon__margin_divider=”true” mpc_icon__margin_css=”margin-top:-6px;margin-right:15px;” mpc_icon__hover_border_css=”border-radius:20px;” mpc_divider__disable=”false” mpc_divider__width=”10″ mpc_divider__align=”left” mpc_divider__content_padding_divider=”true” mpc_divider__content_padding_css=”padding-top:0px;padding-right:0px;padding-bottom:0px;padding-left:0px;” mpc_divider__lines_color=”#dddddd” mpc_divider__padding_divider=”true” mpc_divider__padding_css=”padding-top:3px;padding-bottom:3px;” hover_padding_css=”padding:0px;”]Day six is summit night (and day)! We start off at around midnight, and walk steeply upwards to the summit glaciers. We will be climbing scree for 4 to 5 hours but gain incredible height over a short distance. The views are spectacular. We should be on the crater rim at Stella Point (5739m) as the first rays of the sun hit us. Spectacular ice cliffs within the crater surround us and the views to jagged Mawenzi peak and beyond are breathtaking. Another hour’s walking takes us to the summit, Uhuru Peak (5895m). We begin our descent by returning to Stella Point and then descending on scree slope and track back to Barafu Camp for breakfast, before finally heading down to Mweka Camp for a long well-earned rest.
Mweka Camp |
||
Distance: |
| 16.4km / 9.6 miles |
|
Approx. trekking time: |
| 13hours – 15hours |
|
Zone: |
| Glacial zone and the all preceding zones |
|
Meals: |
| Breakfast |
|
| Lunch |
||
| Dinner |
[/mpc_icon_column][mpc_icon_column layout=”style_3″ alignment=”left” padding_css=”padding:0px;” margin_divider=”true” title_font_preset=”mpc_preset_20″ title_font_color=”#ae0202″ title_font_size=”17″ title_font_line_height=”1.4″ title_font_transform=”uppercase” title_font_align=”left” title=”Day 7: Trek Mweka Camp (3100meters) to Mweka Gate (1630meters)” title_margin_divider=”true” title_margin_css=”margin-bottom:5px;” content_font_preset=”mpc_preset_1″ content_font_color=”#141414″ content_font_size=”14″ content_font_line_height=”1.5″ content_font_align=”left” mpc_icon__icon=”fa fa-map-marker” mpc_icon__icon_color=”#555555″ mpc_icon__icon_size=”20″ mpc_icon__background_color=”#e0e0e0″ mpc_icon__border_css=”border-radius:50px;” mpc_icon__padding_divider=”true” mpc_icon__padding_css=”padding-top:5px;padding-right:5px;padding-bottom:5px;padding-left:5px;” mpc_icon__margin_divider=”true” mpc_icon__margin_css=”margin-top:-6px;margin-right:15px;” mpc_icon__hover_border_css=”border-radius:20px;” mpc_divider__disable=”false” mpc_divider__width=”10″ mpc_divider__align=”left” mpc_divider__content_padding_divider=”true” mpc_divider__content_padding_css=”padding-top:0px;padding-right:0px;padding-bottom:0px;padding-left:0px;” mpc_divider__lines_color=”#dddddd” mpc_divider__padding_divider=”true” mpc_divider__padding_css=”padding-top:3px;padding-bottom:3px;” hover_padding_css=”padding:0px;”]Day six is the final day of trekking on the Machame Route. A gentle trek takes us down through the rainforest to Mweka Gate, where we complete park formalities and receive certificates, which you can hang up with pride! We are then met by our vehicles and return to the hotel in Moshi, where you can treat yourself to a welcome shower then celebrate with cold drinks. Overnight at your arranged Hotel.
Mweka Gate |
||
Distance: |
| 9.1km / 7.5 miles |
|
Approx. trekking time: |
| 3 hours |
|
Zone: |
| Rainforest |
|
Hotel: |
| Bed & Breakfast |
[/mpc_icon_column][mpc_icon_column layout=”style_3″ alignment=”left” padding_css=”padding:0px;” margin_divider=”true” title_font_preset=”mpc_preset_20″ title_font_color=”#ae0202″ title_font_size=”17″ title_font_line_height=”1.4″ title_font_transform=”uppercase” title_font_align=”left” title=”Day 8: Depart Tanzania” title_margin_divider=”true” title_margin_css=”margin-bottom:5px;” content_font_preset=”mpc_preset_1″ content_font_color=”#141414″ content_font_size=”14″ content_font_line_height=”1.5″ content_font_align=”left” mpc_icon__icon=”fa fa-plane” mpc_icon__icon_color=”#555555″ mpc_icon__icon_size=”20″ mpc_icon__background_color=”#e0e0e0″ mpc_icon__border_css=”border-radius:50px;” mpc_icon__padding_divider=”true” mpc_icon__padding_css=”padding-top:5px;padding-right:5px;padding-bottom:5px;padding-left:5px;” mpc_icon__margin_divider=”true” mpc_icon__margin_css=”margin-top:-6px;margin-right:15px;” mpc_icon__hover_border_css=”border-radius:20px;” mpc_divider__disable=”false” mpc_divider__width=”10″ mpc_divider__align=”left” mpc_divider__content_padding_divider=”true” mpc_divider__content_padding_css=”padding-top:0px;padding-right:0px;padding-bottom:0px;padding-left:0px;” mpc_divider__lines_color=”#dddddd” mpc_divider__padding_divider=”true” mpc_divider__padding_css=”padding-top:3px;padding-bottom:3px;” hover_padding_css=”padding:0px;”]This day left for your next destination. A vehicle will take you back to the Hotel in Moshi, where it is definitely time for celebration. Depart for the airport or other destinations in Tanzania. If you have safari, then might be used to beginning your safari or fly to beaches in Zanzibar so as we can arrange many reasonably priced trips and safaris around Moshi and the Kilimanjaro region. If you fly back home our vehicle will be ready to take you to the airport at your time.
Moshi |
||
Meals |
| Breakfast |
[/mpc_icon_column][/mpc_connected_icons][/vc_column][/vc_row][vc_row el_class=”price nope”][vc_column][vc_column_text]
7 DAYS CLIMB + 2DAYS IN HOTEL |
1 Person |
2-4 Persons |
5-7 Persons |
8-10 Persons |
11+ Persons |
|
|---|---|---|---|---|---|---|
MACHAME ROUTE |
$1,920 |
$1,810 |
$1,750 |
$1,690 |
$1,630 |
[/vc_column_text][vc_column_text el_class=”seeme”]
Please rotate your phone into landscape to see the price table. Thank you!
[/vc_column_text][vc_row_inner][vc_column_inner width=”1/2″][vc_column_text]
The climb cost includes:
- Pick up at International Airport;
- Transfer to the hotel Parkview inn or Kilimanjaro wonders hotel
- Professional mountain crew. Each participant will be provided with a porter (who can carry up to 15 kg of personal baggage);
- Fair wages for the mountain crew as approved by the Kilimanjaro National Park Authority (KINAPA), Kilimanjaro Association of Tour Operators (KIATO)
- Kilimanjaro National Park permits.
- Kilimanjaro National Park rescue fees
- Camping/hut fees
- 3 meals daily while on the mountain. The menu includes different soups, garnishes, several types of fish and meat, fresh fruit and vegetables; vegetarian options are available upon request
- Modern tents
- First aid kit
- Warm and comfortable sleeping pads (2 inches thick)
- Portable flush toilets can be provided for free upon clients request
- Group equipment (dining tent, table, chairs, crockery and cutlery)
- Meeting the group at the National Park exit and transfer to the hotel
- Accommodation after the climb
- International certificates for a successful ascent
- Return transfer to Kilimanjaro airport.
[/vc_column_text][/vc_column_inner][vc_column_inner width=”1/2″][vc_column_text]
The climb cost excludes:
- Flights tickets
- Visa fee
- Personal gear rental
- Items of a personal nature
- Laundry services
- Tips for the mountain
Tip on mountain Kilimanjaro is recommended for group sharing as following:
- Guide $15 – $20 per day
- Cook $10 – $15 per day
- Porter $8 – $10 per day
[/vc_column_text][/vc_column_inner][/vc_row_inner][ultimate_modal btn_size=”lg” btn_bg_hover_color=”#c62323″ btn_text=”BOOK THIS TOUR” overlay_bg_opacity=”80″ img_size=”80″][contact-form-7 id=”5″ title=”Fortuna Contact Form 1″][/ultimate_modal][/vc_column][/vc_row][vc_row full_width=”stretch_row” css=”.vc_custom_1522700151812{padding-top: 30px !important;padding-bottom: 30px !important;background-image: url(https://allweatheradventures.com/wp-content/uploads/2015/01/kili-book.jpg?id=23794) !important;background-position: center !important;background-repeat: no-repeat !important;background-size: cover !important;}”][vc_column][vc_column_text]
Join the group for Kilimanjaro Climb
[/vc_column_text][vc_column_text][eventslist categories=”1″]
[/vc_column_text][/vc_column][/vc_row]